General
Request or view feature changes at our [issue tracker](https://github.com/jhuapl-bio/Basestack/issues)
- If you run into issues with the online install, you may want to download (or otherwise obtain) the offline install package
Using the above download links, download the appropriate docker images you’d like e.g.
basestack_consensus.tar.gz(~5.2GB)Run
docker load < basestack_consensus.tar.gzfrom the command line
See below Appendices for more detailed installation instructions.
Windows
Hyper-V Not Enabled - Windows

If you are on older Windows distributions, you may experience an error when attempting to start docker on how HyperV is not enabled.
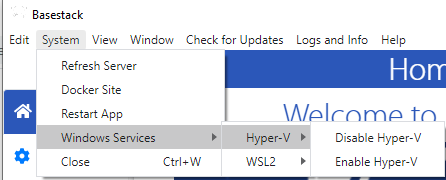
Enable Hyper-V in Basestack
To enable it within Basestack select: System -> Windows Services -> Hyper-V -> Enable Hyper-V.
A window will appear prompting admin rights and then it will automatically being the enable process. See more below.
Enable Hyper-V in Windows System
Alternatively you can enable it within the Host system itself by searching for “Turns Windows features on or off” and selecting “Hyper-V”. This will require a computer restart

WSL2 Not Installed - Windows
The error (seen below) is often shown for newer Windows OS types. If this occurs, you may have different variants. In the included example, I have the option to enable WSL or use Hyper-V.
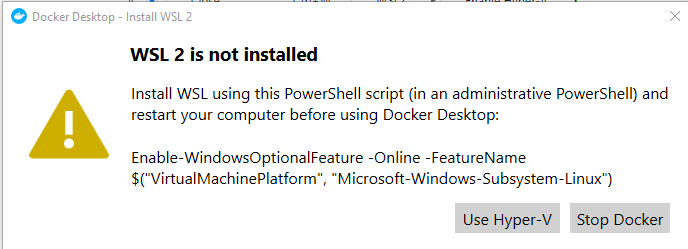
Sometimes, another window will appear regarding installing WSL.
Install WSL2 from External Sources
Please follow that link
Make sure to perform AT LEAST step 4. Once WSL2 is installed/enabled, please restart Docker Desktop
Install WSL2 in Basestack
Alternatively Basestack allows users to download WSL directly.
To Download then Install it within Basestack do:
System -> Windows Services -> WSL2 -> Download WSL2System -> Windows Services -> WSL2 -> Install WSL2

You can then attempt to restart Docker Desktop. This also may require a system restart.
If you are still experiencing issues, attempt to enable virtualization from Basestack:
System -> Windows Services -> WSL2 -> Turn WSL OnSystem -> Windows Services -> WSL2 -> Enable VirtualizationSystem -> Windows Services -> WSL2 -> Set WSL2
Or from “Turn Windows features on or off”. This is also a good way double check that it is now enabled.

You will need to restart your PC/Laptop after doing this!
Switching between HyperV and WSL2 instance
When inside Docker-Desktop, hit the settings (cog) icon at the top-right of the page. Then, select General Tab and tick/un-tick the Use the WSL 2 based engine. Be aware that when using HyperV you may need to adjust resources to accommodate your system appropriately.

WSL2 error on Docker Start
If you’re still experiencing issues after install WSL2 (also making sure you’ve attempted to use both installation methods), there may be an issue with your system’s firewall configuration. To alleviate this, you can modify some settings within Windows by following:
navigate to “Start” button,
type in “Exploit protection” and run it as administrator,
3. once in, nawigate to: “Program settings” “Add program to customise”, adding the two below separatelly, in each case, disabling by unticking: “Code flow guard (CFG)”
C:\WINDOWS\System32\vmwp.exe
C:\WINDOWS\System32\vmcompute.exe

Select choose exact file path

Copy + paste these 2 commands one-by-one then apply changes
C:\WINDOWS\System32\vmwp.exe
C:\WINDOWS\System32\vmcompute.exe


Finally, restart Docker Desktop
*Credit to this solution
Virtualization Disabled - Windows
In order for either of the above to work, you need to ensure that virtualization is enabled in your firmware. Some processors do so by default, others do not. If you are having issue with starting Docker despite following either of the options above, please see below.
First, check that your CPU can support virtualization by viewing the model on Intel/AMD product page(s)
You can first check if it is enabled by going into the Task Manager and seeing if the Virtualization attribute is enabled.

If it is not, open up Command Terminal and type: systeminfo. Scroll to the bottom of the output and check if the Firmware has it enabled for Hyper-V requirements.

If not, you will need to enable Virtualization in your BIOS. This process will look different based on everyone’s system. You should try to follow the instructions in this [link](https://www.thewindowsclub.com/disable-hardware-virtualization-in-windows-10). Choose your manufacturer type.
You might also experience an error about BIOS not having virtiualization enabled as soon as Docker attempts to start

Follow these steps from https://bce.berkeley.edu/enabling-virtualization-in-your-pc-bios.html:
- Reboot your computer
Right when the computer is coming up from the black screen, press Delete, Esc, F1, F2, or F4. Each computer manufacturer uses a different key but it may show a brief message at boot telling you which one to press. If you miss it the first time, reboot and try again. It helps to tap the key about twice a second when the computer is coming up. If you are not able to enter the BIOS via this method, consult your computer’s manual.
In the BIOS settings, find the configuration items related to the CPU. These can be in under the headings Processor, Chipset, or Northbridge.
Enable virtualization; the setting may be called VT-x, AMD-V, SVM, or Vanderpool. Enable Intel VT-d or AMD IOMMU if the options are available.
Save your changes and reboot.
Delete any existing VMs (Machine > Remove ** and select ** Delete all files) and re-import the .ova file (following step 4 and subsequent steps of the installation instructions).
Check if your system supports Virtualization
If you are unable to find the Virtualization settings in your BIOS it may mean that your laptop does not support it. If you want to try to find this out yourself, then you can try:
On Windows, download and run a Microsoft utility. You can also download utilities to check if your CPU is capable of virtualization, if not enabled. Hyper-V must be disabled in order for VirtualBox to run 64-bit guest operating systems. Visit the “turn Windows feature on or off” application and make sure Hyper-V is not checked.
On Linux, open a terminal window and run:
egrep -q 'vmx|svm' /proc/cpuinfo && echo yes || echo no
Typically, though, to enter BIOS you must restart the computer and while it is booting hit DEL or F2 or sometimes F12. This process is usually very quick so be ready. When it is booting, you may be able to catch the necessary keys flash.
The default BIOS should look like the one below. In there, head to the Advanced tab and check if Virtualization is present. If so, enable it, save changes, and restart. If not, try to search in other tabs or open up some options that have further submenus within them as there is no guarantee it will be directly on the base Advanced tab.

On AMD CPU’s if you don’t see virtualization it may be labeled as SVM in the Advanced tab

If the option is not present in the BIOS that means that your CPU does not support Virtualization and Docker won’t be able to properly run on your system.
docker_support
Operation not permitted - Windows
If you receive an error about operation not being permitted and you’re reinstalling or updating Basestack (see image), attempt to uninstall Basestack and reinstall it.
Operation not permitted error

Uninstall Basestack

Docker Pipelines Do Not Run With External Drives
If you need to use an external Drives within the modules AND are using Docker-Desktop for Windows with WSL2, you will need to likely mount your external drive within WSL first.
This is done in 2 steps: 1. Start wsl from the command line by typing wsl into the quicklaunch and starting it - Make sure Docker is running on your system before starting this - A terminal window will appear at the start. Done fear you can follow step 2 easily by copying it in the terminal and just changing the <drive_letter> (See below for more info)
2. mkdir -p /mnt/host/<drive_letter> && mount -t drvfs <drive_letter> /mnt/host/<drive_letter>
- This process maps your new drive letter to the exact letter in windows. For instance in the example my flash drive is E: and /mnt/host/e is what is it mapped to
- <drive_letter> is whatever the letter is from your system. For example the example shown here is E: but yours may (likely to) differ

Alternatively, you can switch WSL2 instance to HyperV by following this [step](#switching-between-hyperv-and-wsl2-instance)
I/O timeout
If installing as the offline method, sometimes you may retrieve and I/O exception as an error message. This is typically because you’ve tried to send docker to build too many images from large files in a short period of time. To fix this, you’ll need to rerun docker a specific way

Simply seach for Hyper-V Manager in your toolbar, select the VM (usually your username is in its name), and then Turn Off. Docker will then shut down and you can restart it
Docker Connection
If you receive an error that you couldn’t connect to docker, please try to restart via the taskbar

‘You are not allowed to use Docker, you must be in the “docker-users” group’ - Windows
In Basestack select System -> Windows Services -> Add User Docker-Users. When completed you should see that either you’re already a part of that group OR you’ve been successfully added.

Alternatively if the above does not work try the following:
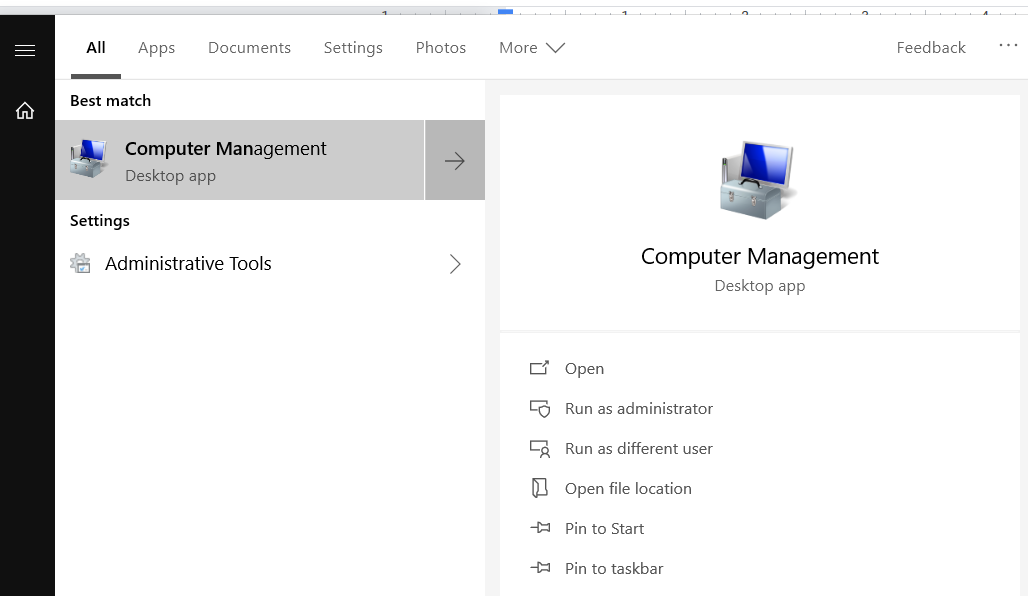
In the Windows search taskbar (bottom left icon), find
Computer Management
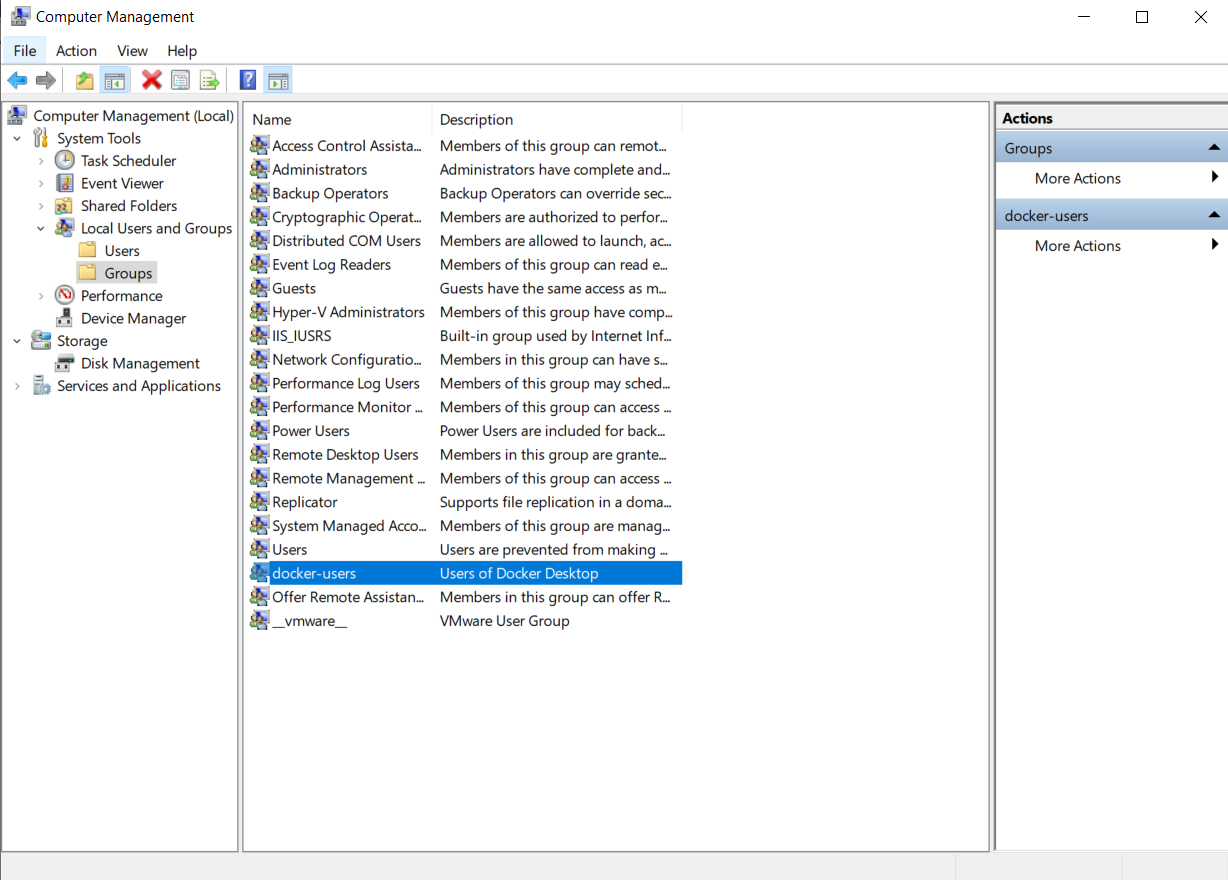
Select (left-side) System Tools -> Local Users and Groups -> Groups
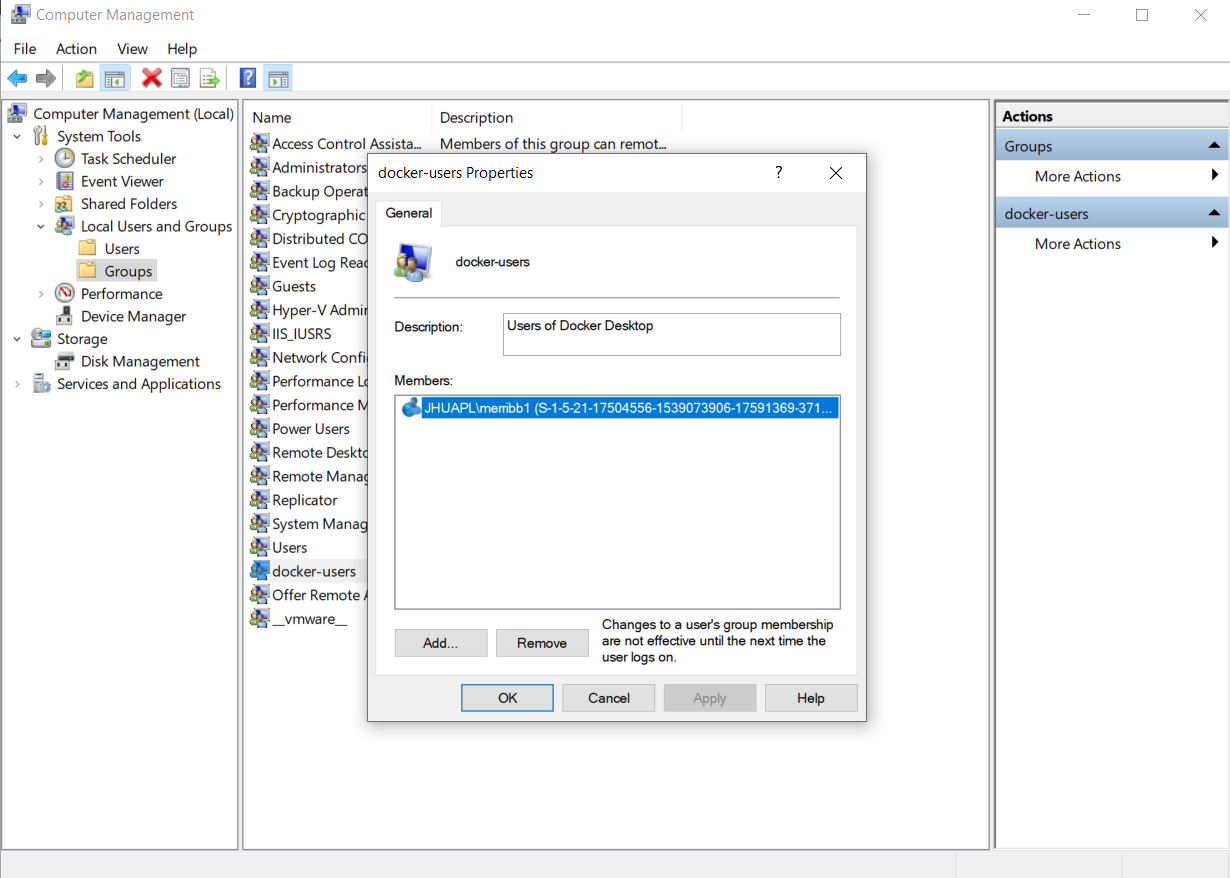
Double click
docker-usersand see if your name is there, if not:

Select the
Usersfolder right about where you clickedGroupsSelect the name of your user
- enter
docker-usersinto the object field and add. You will need to log out and back into your account for this to take effect
- enter
Linux
Permisson denied (Linux)
Please ensure that you follow the correct Docker Installation here to using userns-remap
Note that this will map all of your processes INSIDE the docker containers to your user id if used properly. You will need sudo to delete any files or folders that are causing issues.